Instead of an introduction: I don't know if you like masquerade and everything that goes with it or not. They are dear to me because it is an opportunity to turn into something else, into someone else, at least for that one moment. We can, for example, be our favorite hero, our favorite Disney princess, a bad character from a series, anyone. I never liked ready-made shopping solutions. It was always supposed to be my creation. In the last blog, I wrote about lamination - the technique of gluing layers of paper. It was thanks to this technique that I made numerous masks. Perhaps my love for making masks was instilled in me by my primary school teacher when she gave us the task of making one. Some people reached for simpler solutions, I had to try the technique she presented to us.
I remember that my first cashmere mask was a parrot, that a ball was used to make the head. I put smaller containers on the ball to get a beak. And paper by paper, the green parrot Polly was born. Last year, my daughter and I played around and made a Dali mask worn by characters from the series we were watching: La casa de papel. I will share with you step-by-step instructions. Another interesting experience. It's so exciting to create something unique and simple.
- Materials you have at home:
- The best thing is that you have all the "ingredients" at home, such as gauze, old newspapers, paper towels, napkins, paint, glue. Maybe you only need to get gauze, but I'm sure a cotton cloth or a piece of sheet would do the trick. We used gauze as a base because the mask is still put on the face. Ana served as a model.
- Character as desired:
- Why exactly La casa de papel? We discovered the series, were surprised by numerous unexpected plots. In fact, it didn't even take long for Ana to find a red hoodie in the closet ;). No, she didn't think of being Little Red Riding Hood. I guess she outgrew it at the age of 15.
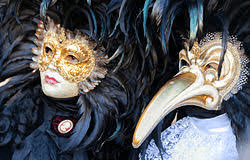
- You can make just Little Red Riding Hood or a wolf, Luka the hunter or whatever comes to your mind. The base is always the same. Necessary materials too. Play around. Follow your imagination. The result will surely be a unique, creative and unique mask that will be worn with pride. It is also possible to make those typical Venetian beak masks. This second one needs some feathers and a little more gold color. The masking process is the same as making a piñata (see my previous blog). You can use a balloon or a ball as a base (if the mask will only be on the eyes or face).
 (I found the photo at: https://sh.wikipedia.org/wiki/Venecijanski_karneval
- Step-by-step instructions with photos- for making our Dali from La casa de papel
 (I found the photo at: https://sh.wikipedia.org/wiki/Venecijanski_karneval
- 1. Ana put a band on her head, we attached gauze to it
- 2. we cut the holes for the eyes

- 3. cut a ping pong ball, drilled it with a hot glue gun, I colored the edge like pupils with a black marker
- 4. I pasted the first layer with liquid paper glue on Ana's face (it is easy to wash and is not harmful); the other layers are glued to the side of the plastic container as a base (it should be something that follows the line of the face and the shape you want the mask to be).
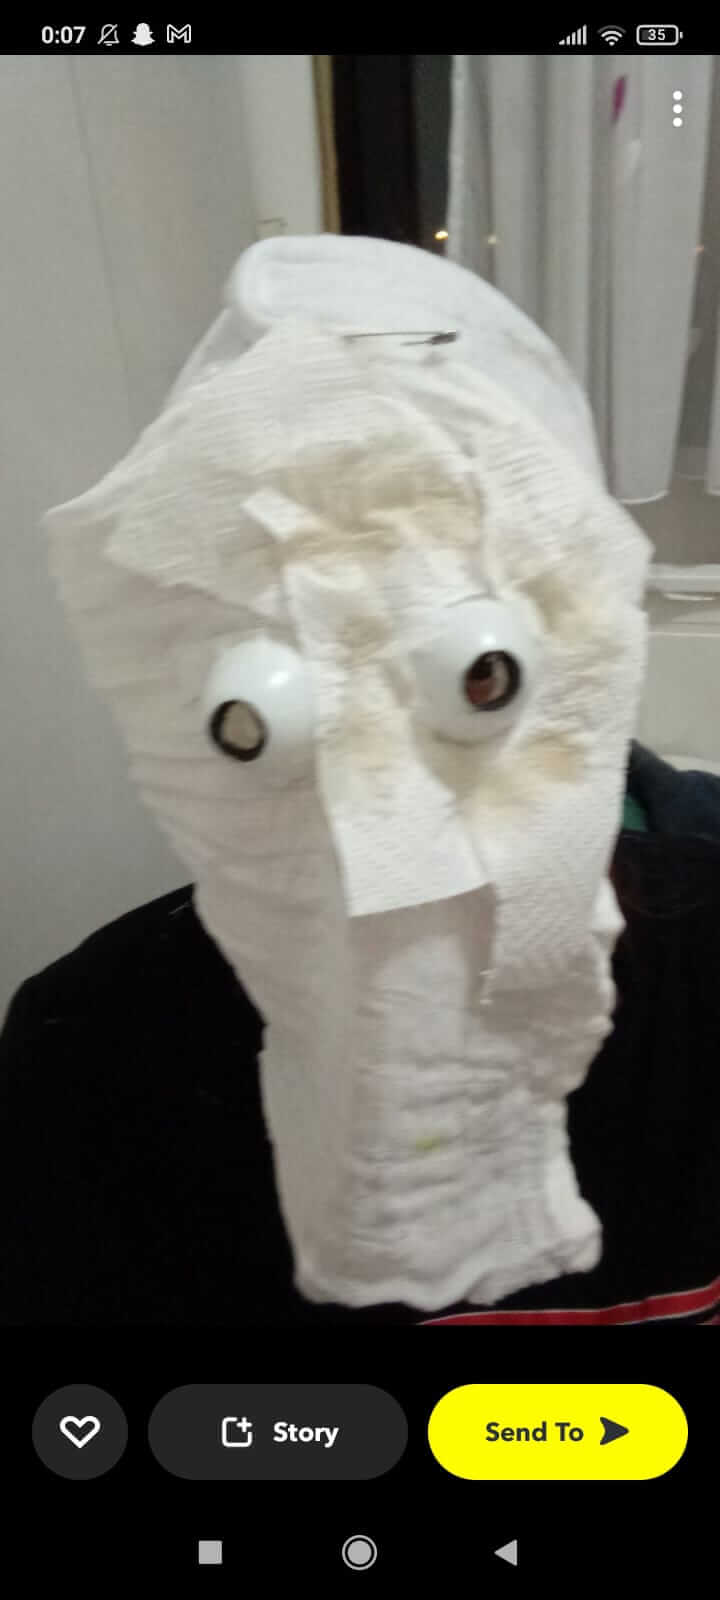
- 5. the moustache, nose, mouth are shaped with toilet paper by stacking roller shapes to resemble the real face and mask from the series as much as possible
- 6.
 this is what it looked like before we finally cut it out (before that step, Ana tried it several times in combination with different rubbers to hold onto the head, until we found a winning combination. We simply stapled the rubber on the inside of the mask so that it would not be seen .
 - Ana chose to be Tokyo, so she tied her hair and dyed it black with that hair dye spray. From the highlighted photo in the header, it can be seen that he can easily join in the robbery.
 this is what it looked like before we finally cut it out (before that step, Ana tried it several times in combination with different rubbers to hold onto the head, until we found a winning combination. We simply stapled the rubber on the inside of the mask so that it would not be seen .
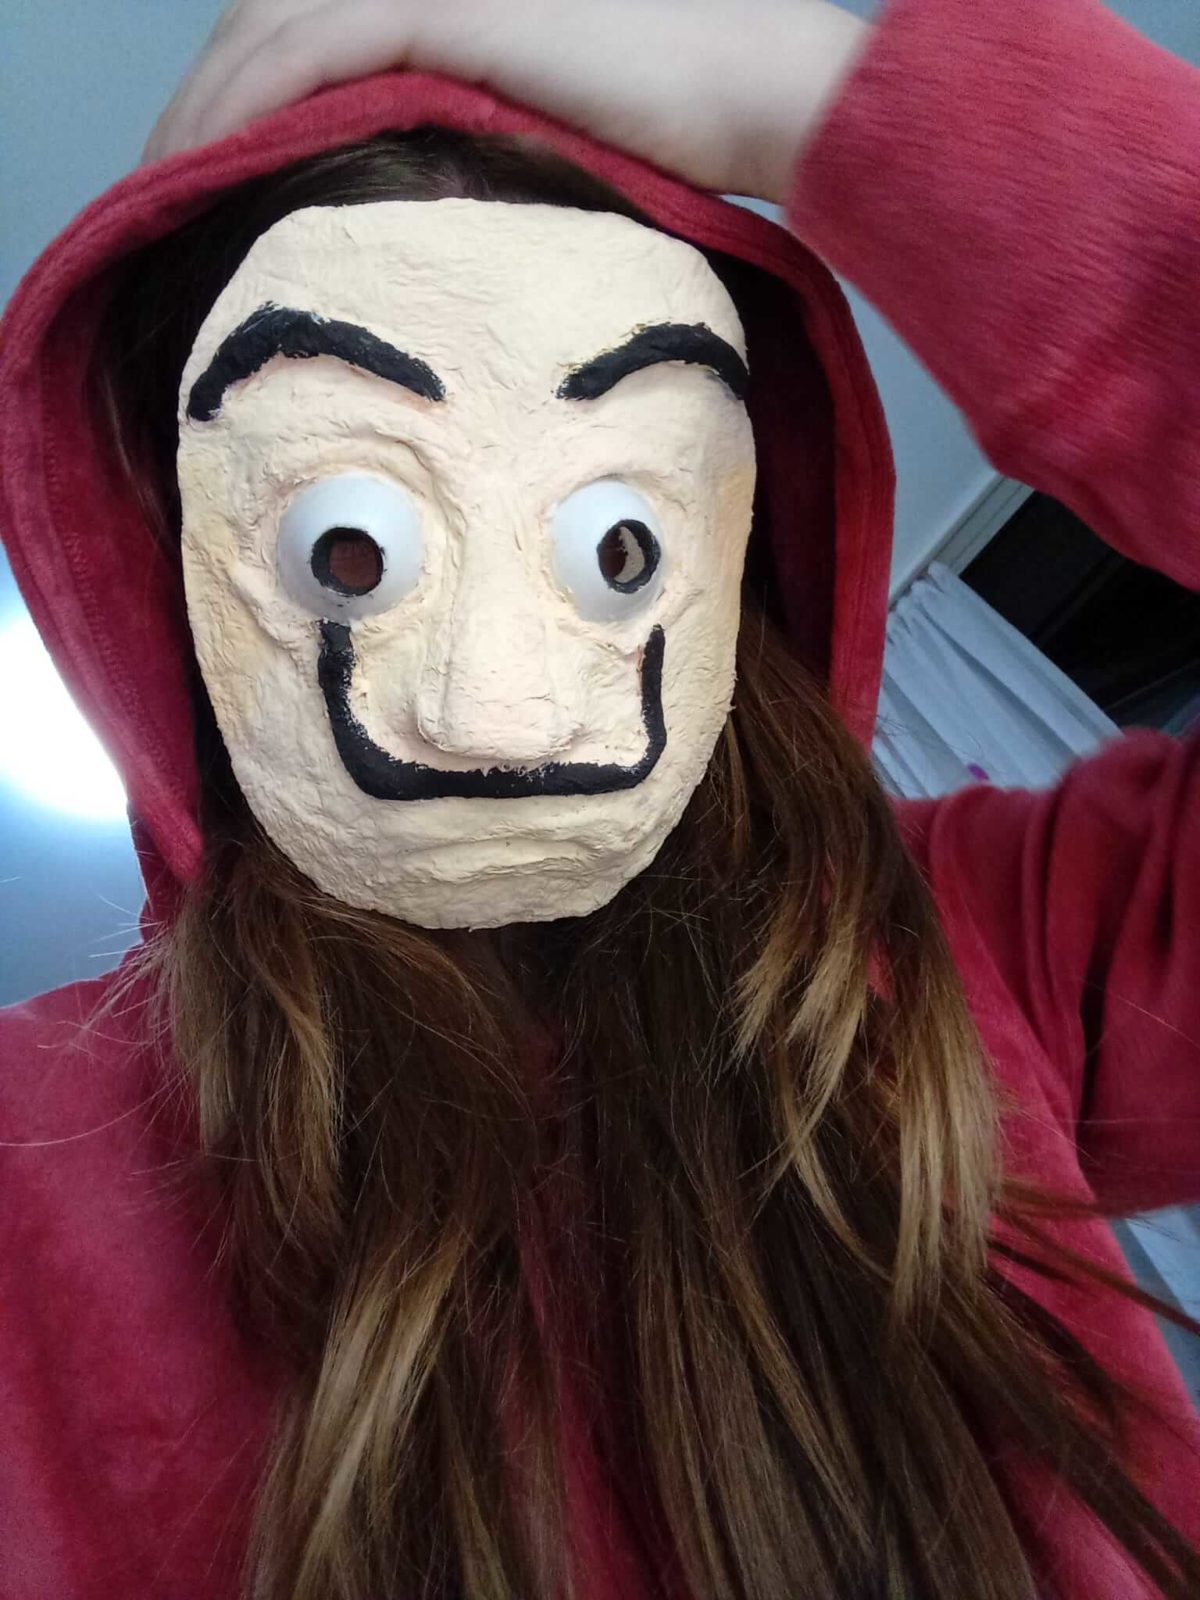
- Display of different designs:
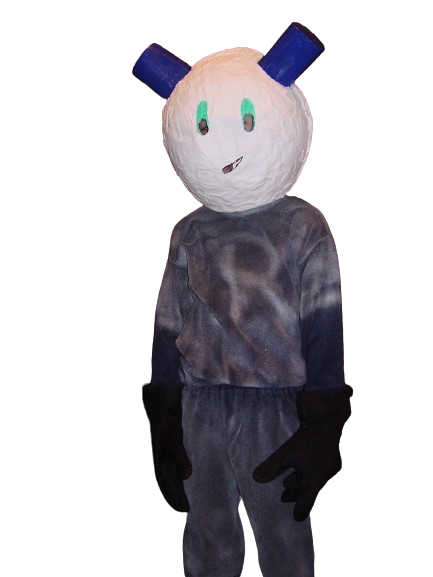
- Once upon a time, back in kindergarten, Luka wanted to be Robotboy (at that time, that children's series was shown), so I got to work. I sprayed his old navy blue pajamas with silver spray. On his head he had a mesh mask, a huge white ball with blue "bells" on each side. He was irresistible 😉 Wasn't he?
- Once upon a time, back in kindergarten, Luka wanted to be Robotboy (at that time, that children's series was shown), so I got to work. I sprayed his old navy blue pajamas with silver spray. On his head he had a mesh mask, a huge white ball with blue "bells" on each side. He was irresistible 😉 Wasn't he?
- Additional tips for creativity:
- Each made mask has its own story. Each one is special. Unique and unrepeatable. That's why we love them. Make your own and give it your personal touch.
- Experiment with different colors, shapes or accessories. Connect the incompatible and find your light. (Where did I read that?)
- Display of completed creations:
- And feel free to share your finished creation with us. If there are people interested, we can also organize a competition for the best mask. At one time, my daughter won a McDonalds coupon for the best mask. She was a stork then. The best stork ever.
- Be creative! Let your imagination run wild and enjoy creating! Thank you for reading and participating!
Instead of a conclusion:
me: "Hey, Tokyo! see you in the heist. We have to try these new masks of ours!”
Tokyo: “I'm looking forward to it! And don't forget, the most important thing is to look cool while wearing that mask.“